First Mod - move the Stepper controller inside the main unit.
I recently bough a 30W fibre Laser from Commarker and it's great peice of kit for marking and etching metal, something my Creality Diode Laser isn't so good at doing
The fibre laser is a Galvo based laser that uses mirrors to control where the laser lands on the material being etched and is very particular about the focus distance from the lens to the material being etched.
Depending of the lens that is fitted to the Galvo head both the etching area and the focus distance changes, the supplied 110mm x 110mm on my laser has a focus distance of 197mm from the base of the Galvo housing to the top surface of the material being etched, this means that sepending on the thickness of the material the height of the Galvo needs adhusting.
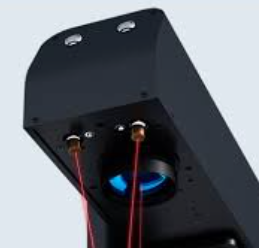
A 500mm ruler is supplied with the laser for you to measure the required distance as well as two focus laser pionters that are angled to meet together when the correct focus distance is acheived.
 |
| B4 30W Fibre Laser |
 |
| Focus point lasers |
The rotary addon is supplied in two parts, the actual Stepper controlled rotary chuck and the Stepper controller, mounted inside its own aluminiun box. which is connected to the laser main unit with a cable.
So, my first update was to place the stepper controller inside the Laser main unit as the 30W version comes in a tall enclosre and there's loads of room inside to include the stepper controller.
Step1
Step2
Remove the 4 way connector from the original stepper controller box and extend the wires so they will reach the other 4 way screw terminal connector on the controller.
Replace the original 5 pin connector with the new 4 pin connector.
DON'T forget to feed the wires through from the rear of the case and add the nut and washer before connecting them to the terminal block.
Step4
Secure the Stepper controller to the base of the main unit with an M4 screw, I used just one at end of the controller nearset the motor controller.
 |
| M4 threaded hole to secure the stepper controller |
You should now have a single 4 pin connector on the rear of you main laser unit which you connect your rotary chuck to.
While I had the unit apart I also took the opportunity to use the two spare 5 pin connectors to add external access to control the Z height lift motor, details of this mod will be in the next post.


No comments:
Post a Comment